Publicise Your Organization Status
Now that you have joined Djikstra on GitHub, you can publicise your organization status by simply following the below given steps.
Go to Djikstra’s Page
Section titled “Go to Djikstra’s Page”For the first step, click on this link to go to Djikstra’s GitHub Page.
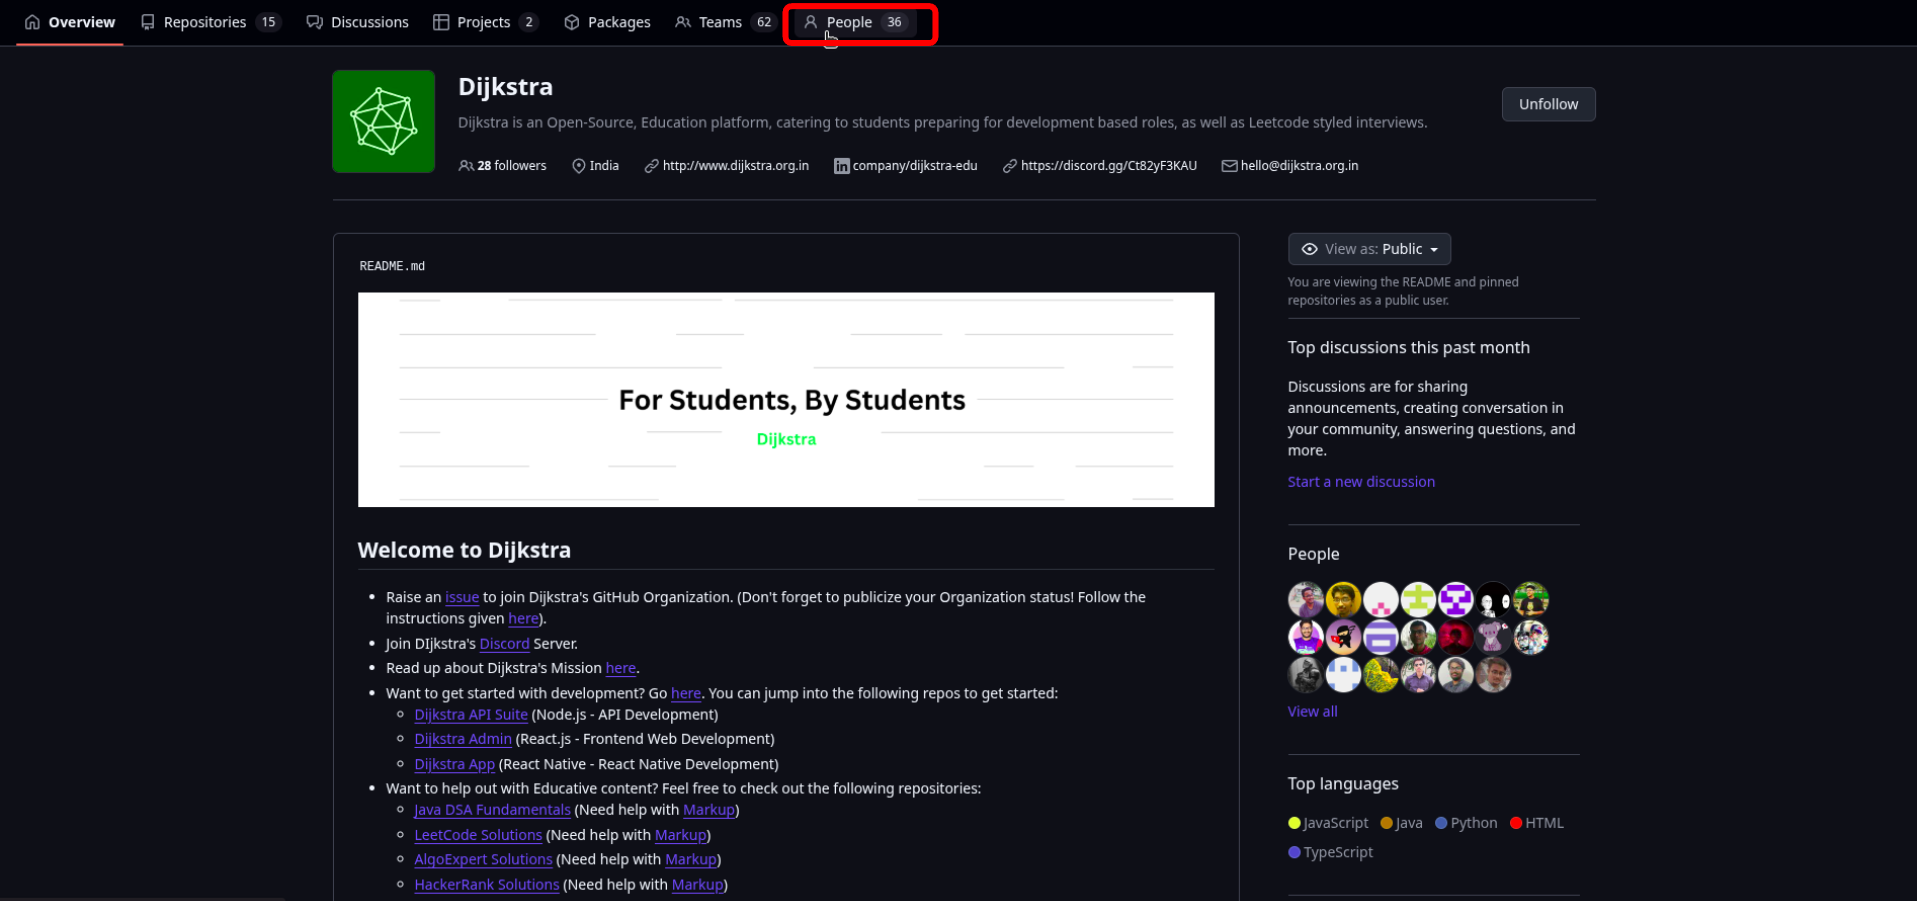
Go to People
Section titled “Go to People”On the top bar of Djikstra’s GitHub Page, youw will notice several tabs. Click on the ‘people’ tab which is rightmost tab among these. This will redirect you to a page with a list of all of Djikstra’s members.
Navigate to Your Name
Section titled “Navigate to Your Name”On this page, all the members of Djikstra on GitHub will be listed. If you have followed the previous guide and had successfully joined Djikstra, then your account will also be in this list. Scroll through this list and find your GitHub account for the next step.
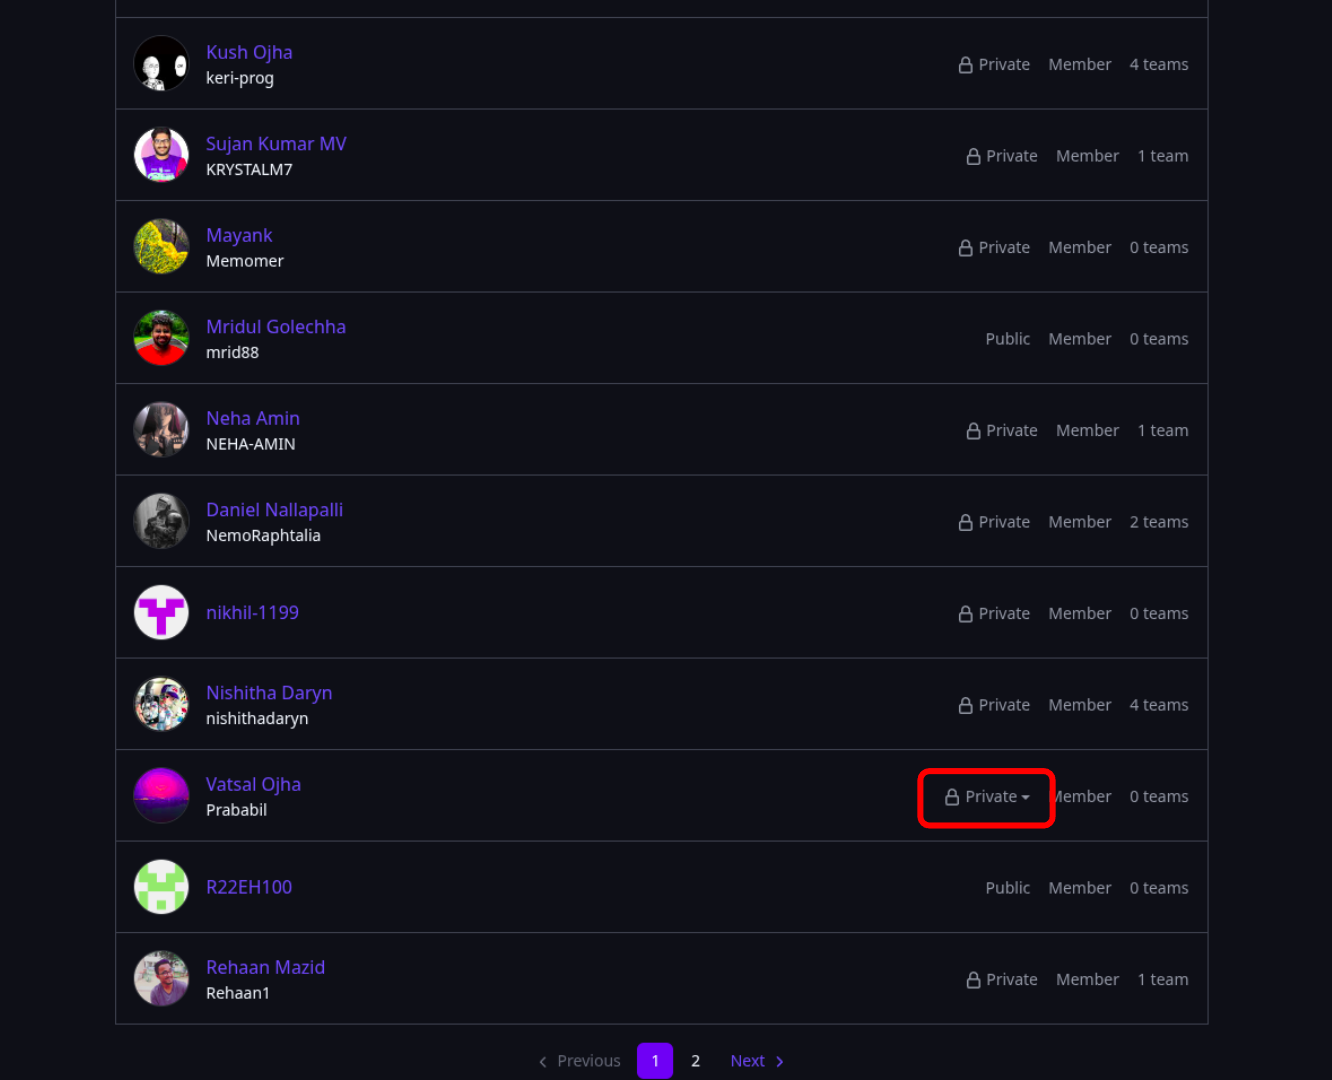
Click on ‘Private’
Section titled “Click on ‘Private’”Once you have found your name, to the right your name, you will notice ‘Private’ written along with drop down arrow. Click on ‘Private’ to open a the drop down menu.
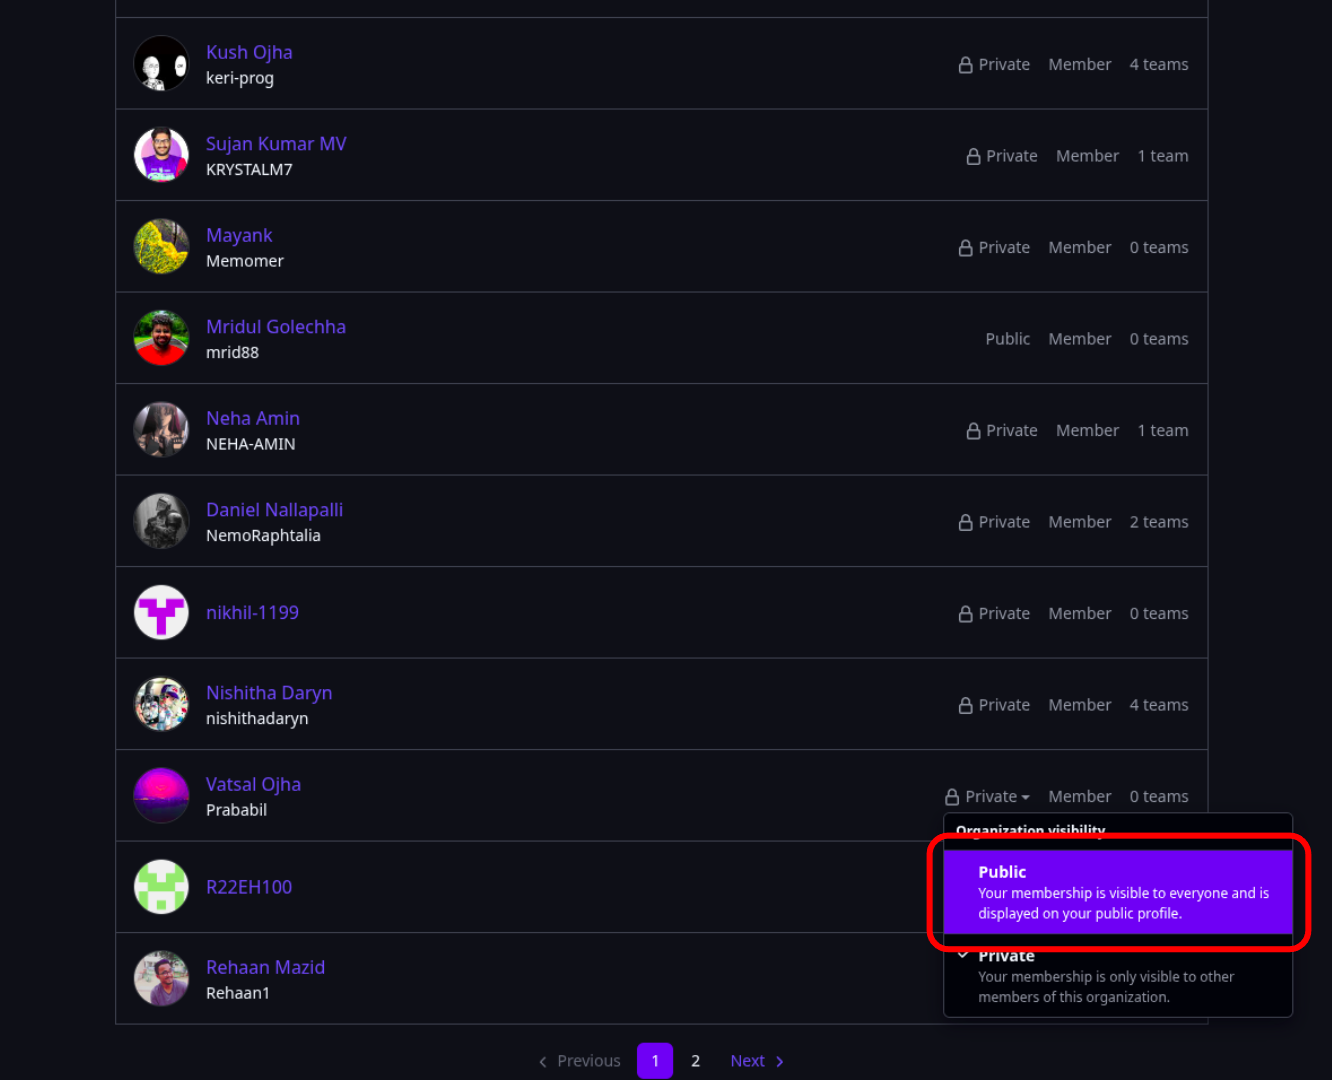
Change Organization Visibility
Section titled “Change Organization Visibility”Once the drop down menu opens, you will notice two options, a ‘Public’ option and a ‘Private’ option with a check mark next to it. The check mark indicates that your current organization status is private. Click on the ‘Public’ option to finally publicise your organization status. If there is already a check mark next to the public option, it means that your organization status is already public.
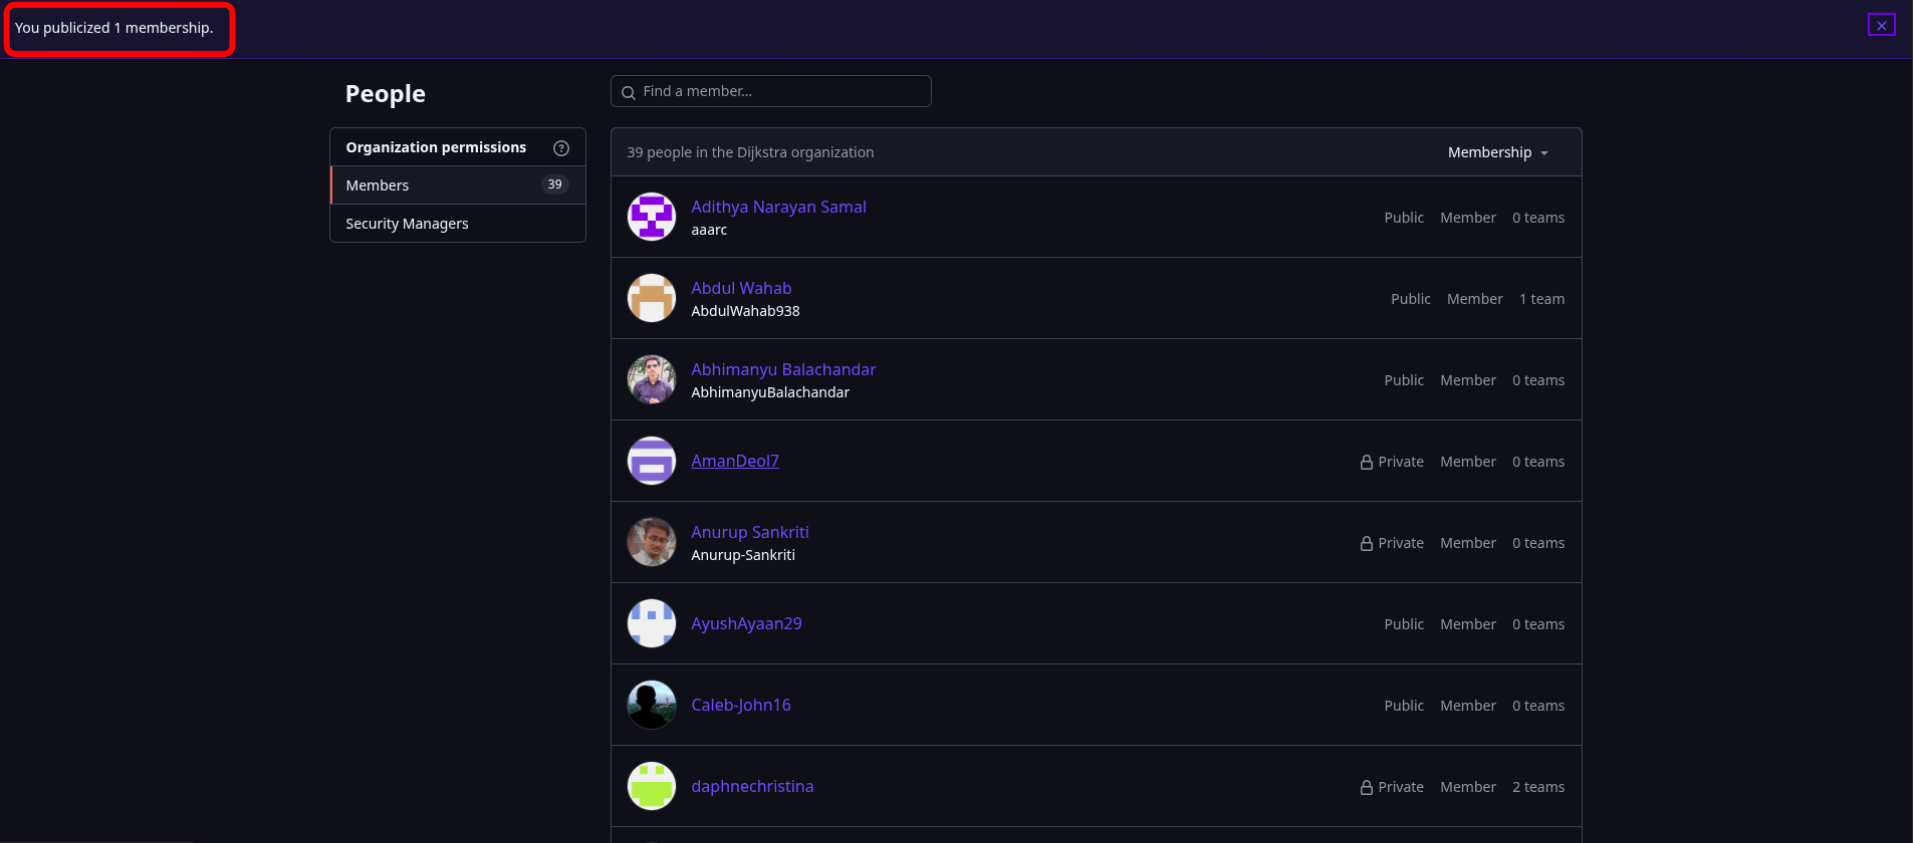
Confirm Publicisation
Section titled “Confirm Publicisation”Once you have clicked on the ‘Public’ option, you will notice a notification from github at the top the page indicating that your organization status has been successfully changed.